Amy Foltz Photography
  • Home
  • About Me
  • Weddings
  • Session Information
    • Pricing
    • Families
      • Babies
      • Children
      • Families
    • Seniors
  • Contact Me
photo of newborn baby boy with personalized blanket


I've been waiting for months to meet little Mr. Will. His mommy told me last fall at Lucas's 2-year session that he was going to be a big brother. Here are a couple of photos from that session that I couldn't share yet then.

photo of a family expecting baby #2

photo of a family's feet with baby shoes to announce that baby #2 is on the way

Will is such a sweet little man. He slept a little at the beginning of his session, woke up for a while and gave his mommy this sweet smile, then fell into a nice, deep sleep at the end.

photo of newborn smiling in mommy's arms

Will was fussing a little and Kelly lifted him up for a little snuggle. Little Man already loves his mommy and went in for a kiss!

photo of baby kissing mommy

Big brother Lucas loves his new little brother (who, by the way, looks just like him!)

photo of toddler and newborn brothers

Will has one of the cutest nurseries I've seen. His mommy and daddy did an awesome job decorating it, including hours stenciling one wall.

photo of mommy and newborn in nursery

photo of a mommy holding a newborn baby boy

photo of new parents with their baby boy

photo of a newborn and his daddy

A daddy holding his newborn son in the nursery


photo of a baby sleeping in his crib

photo of a newborn swaddled and asleep in his crib

Will looked super content in Daddy's and Mommy's arms.

photo of a baby sleeping in Daddy's arms


photo of a newborn sleeping in Mommy's arms

photo of a baby sleeping

photo of a newborn boy asleep on a blanket

This is week 26 for the This is Our Life project and the theme is "composition."

I have a habit of getting in a rut with the "rule of thirds" so this time I went with a centered composition. It keeps the focus right where it should be - on my awesome, almost-ten-years-old, smart, artistic, kind (except to his sister) boy.


This is week 25 for the This is Our Life project and the theme is "summertime."


Yesterday was a pretty typical summer Wednesday around here:

 Daniel was at work. 

I took the kids to the library, McDonald's, Wal-Mart, and the park. 

I did a little work and a little napping while the little boys napped and the big kids read in their rooms. 

The kids rode their bikes, played on the tire swing, and then splashed in a mud puddle.

I turned the hose on to rinse them off and it ended in an epic water fight. 

I talked to a friend on the phone while I cooked supper. 

We ate.

Daniel picked the big kids up for church and I stayed home with the little kids. 

The kids went to bed.

 Daniel and I stayed up much later than we should have watching random things on TV.
Now that you've taken loads and loads of awesome photos of your kids, what do you do next? I'm going to share my workflow, starting with uploading to the computer all the way through printing. This is what I do for my personal photos, but there are plenty of other ways to go about it, this is just what works for me.

The first step after I've taken the photos is uploading to the computer. You can either hook your camera up to your computer, or if your computer has a card reader built in you can just put your card in, which is usually faster and also doesn't use up your camera battery.

If I've taken lots of photos of one particular event, I usually upload them right away. If I've only taken a few I usually wait until I have more unless I'm in a hurry to post one to facebook. I always upload them at least every couple of weeks.

Once I have the photos on my computer, I usually import them right into Adobe Lightroom. I use version 3. If you have an older or newer version, I'm assuming it's still set up the same way, but there will be slight differences.

If you've never used Lightroom, check out this tutorial. It's the first one I read that made sense to me when I bought Lightroom last year. Honestly, it took me about a month to get comfortable with Lightroom, but I actually think it would have been easier if I hadn't already been so used to Photoshop. I don't love change and I get set in my ways, so it took me a while. But once I learned it, I LOVED it. It's so much quicker and easier. My favorite thing about it is how easy it is to get one photo in a set adjusted just right and then apply those settings to all the photos in the set (assuming they all have the same lighting, etc. already)

Ok, so I open Lightroom, then click import and locate the photos I want to use. They're usually in a subfolder in my photos folder filed under the date they were imported. After importing (which takes me less than a minute, it might take longer if your computer is on the old/slow side), I go through (in loupe view) and flag the ones I want to keep. Then after that I click edit, then select by flag, then select unflagged, and then hit the delete key on the keyboard. There should be a dialog box that asks if you want to delete them from the disk or just remove from Lightroom. I just remove from Lightroom for now.

Once I have all the keepers, I click on the develop module (it's in the top right corner) and start editing. First, I adjust exposure if it's needed. Just move the slider to the left or right to make the photos lighter or darker. Then I adjust the color balance if needed. I usually start with an auto adjustment then move the sliders until it looks good. It's important to note that if your monitor is not calibrated, the colors you see on your screen will NOT be right! You can either buy a calibration device and do it that way, or you can try to eyeball it. If you've using Windows 7, just go to control panel - appearance and personalization - display - calibrate color. You can try to adjust with the buttons on your monitor if it has them. Laptop monitors are really bad for editing. Even if you manage to get it adjusted just right, you have to make sure to look at it at exactly the right angle to see the colors correctly. I gave up on mine and just plug my laptop into an external monitor when I'm editing and it works great.

After I adjust the color balance, I sometimes adjust the tone curve if the image needs a little contrast boost. Just a nice little S-curve works wonders.

Then  I scroll down towards the bottom and move the sharpen slider over to about 50. I only do this on photos from my DSLR. It makes the photos from my point and shoot look kind of weird.

If you want to convert an image to black and white, just click on "black and white". Easy, right? You'll most likely need to adjust the exposure, contrast, and tone curve a bit once you've converted it to black and white.

If I have a group of photos that were all taken at the same time in the same lighting, I'll adjust the first one, then on the next I'll click previous and it will apply the settings from the last photo to that one. You can also select the whole group of photos, adjust one, then click sync, but I usually do it one at a time in case there are small adjustments that need made. I'm a little OCD like that.

The crop tool looks like a grid and you can twist it to straighten a photo and use the grid to line things up and also use it to crop according to the rule of thirds.


After I'm done editing the photos, I click back on the library module, then select all photos and then click export. Here's a screen shot of my export settings.


I export the images into a folder labeled for each month. I have a folder titled "edit" for each month, and then I export again into a separate folder titled "fb" for each month with smaller files to make uploading to facebook quicker. When I export to that folder, I just click on "resize to fit" and "sharpen for screen" (see the photo above) and also make sure to change the folder to "month fb" instead of "month edit" and then click export. All the other settings stay the same.

There are a lot of other awesome things you can do in Lightroom, those are just the basics that I do to pretty much every personal image. Client images and ones that I plan to print large or blog usually get some extra TLC beyond these basic steps.

I also use Photoshop (CS5) for fine-tuning, which I won't go into here, or if I have just a couple of photos to edit, or if I'm already in the middle of editing something else in Lightroom.

I've never used Photoshop Elements, but I assume it's pretty similar.

The first thing I do after opening Photoshop is open the image, or images, I want to work on. Just go to file, then open, then search for the image you want. Click open, or double click on the image. I do pretty much the same things I do in Lightroom. To adjust exposure, just click on image (at the top of the screen), then adjustments, then exposure, then just move the sliders till it looks right.

If the color looks off to me, I duplicate the layer (under the layers drop-down menu) then do an auto color adjustment (under the image drop-down menu), then go to the layers palate (on the left side of the screen) and reduce the opacity of the top layer. I do it this way because the auto adjustment tends to overcorrect the image, so that fades it out and gets it closer to where I want it. There are many, many other ways to do that, that's just the way I do it.

If the image needs a little contrast boost, I adjust curves. It's under the adjustments menu under the image drop-down menu. Just click on the line in the bottom half and drag down a bit, then click in the top half and drag up a little. It's should look a little like an S.


If I want to convert to black and white (which I do a lot), I skip the whole color balance and curve adjustment and go straight to the image drop-down menu, click on adjustments, then gradient map. Make sure that your foreground color is set to black and your background color is set to white (bottom left corner of the screen, at the bottom of the tool bar). There are about a million ways to convert to black and white in Photoshop, but that's my favorite. After I do a gradient map, then I adjust the curves if I need to.

After I'm all done, I click on "save as" (under the file menu) and save in the edit folder for that month. Then I resize (under the image menu) to 960 px wide. This is a good size for facebook. Then I "save as" again in the FB folder for that month. I never bother to change the file name unless I keep 2 versions of the same image - like one color and one black and white, or one cropped and one not. Then I'll add a 2 or A at the end of the file name.

At the end of the month, I'll go to the pictures folder (in Windows), click "new folder" and title it June (or whatever that month is), then drag the June sooc (that's straight out of camera), June edit, and June fb, all over to the June folder, then drag the June folder to the 2013 folder. Then I burn two copies of the edit folder to DVD. One stays in a box by my desk and the other stays in a box in my dad's office. That way if our house ever burned down I'd still have the other copy.


I also upload them all to my account at www.unitprints.com. If you've had a session with me in the last two or three years, you already have an account there, and if not, it's super easy (and FREE!) to set one up. You can make as many different albums as you want and you can also share your albums with friends and family, and order professional quality prints (they come from the same pro lab I use). If you ever lose your DVD, or your hard drive crashes, you can just log in to your account and download the files you need. You have to download each file individually, which is kind of a pain, but hey, it's free.

Now that the images are edited and backed up, what next? I print some just to have. I have a couple of custom image boxes (the same ones you can get with a lifestyle session with me) that I'm slowly adding to, so sometimes I'll order a 4x6 or 5x7 of my favorites. I always order from Color Incorporated (the parent company of unitprints), I never print myself. The quality and longevity of real professional prints is far superior to any home printer and the cost is actually about the same.


We live in a fairly small house for a family of 6, and wall space is pretty limited, so I don't have room for a lot of prints on the wall. I have one large family photo (24x36) in the living room, an 8x10 of each kid in the living room, and other than that it's just random 4x6's and 5x7's wherever I can find room. One of these days when we buy a bigger house, I plan to have lots and lots of large photos printed for every room. But for now, this is what works for us. You can check out this blog post for more about ways I've used photos, and check out this pinterest board to see some ideas I'm dying to use.


I also make digital scrapbooks for each of my kids. I used to do one per year, but I'm scrapping a little less now and I'm planning to do two or three years before I print them. I make simple photobooks for the rest of the photos. I do 3-4 per year, but that's only because I take about a million photos every year. Ok, not a million, but there are usually well over 2000 keepers each year and most of them find their way into the books. Most people could probably easily do one per year. I'll eventually give the scrapbooks to the kids when they move out, so that's why I do both.


If you've never done scrapbooks digitally, and you have Photoshop, you should totally try. I tried it on a whim back in 2008 and I'll never go back to paper scrapping. There's definitely a big learning curve, and I'm not going to go into details about it here, but if you're interested in trying, just google digital scrapbooking tutorials and you'll find tons of information. There are lots and lots and lots of free "kits" out there, so in almost 6 years I've only paid for maybe 3 or 4 kits. Check out CraftCrave for daily listings of free kits. The kits are usually only free for a limited time, so check back often.  I usually scrapbook like crazy in January and February for the year before and then don't do any the rest of the year. It works for me.


My other photobooks just have simple white pages with some captions here and there. I print them and my scrapbooks through Blurb. Their Booksmart software is super simple and has lots of templates, and it's easy to create your own templates too, which is what I usually do. You just import your photos, choose you template for each page, then drag and drop your photos into the pages. Easy peasy. I'll share one little tip that it took me an embarrassingly long time to figure out. To get a thin black border around each image (which I just think looks nice) just click on "border" and pick one, then click "apply to all photos." This will only apply to the photo you're on plus any on previous pages, so I just wait and do this at the end. I don't know why it took me so long to notice that option.


If you order books through Blurb from this link you'll get $20 off your first book, and I'll also get a $20 credit. I've always been super happy with their quality (and even use their pro line for wedding albums) but you should know that for some reason, color photos tend to look way too warm on the covers. The pages are fine, but the process they use for the covers is different, so I just always use a black and white photo on the covers and it looks great.

So that's it. If you missed any of the other posts in this series, you can click here to see them all. I hope you've enjoyed this series and use the information to take lots and lots of amazing photos of your kids! If you have any questions about anything I've covered, or anything I didn't cover, feel free to leave a comment here or on my facebook page, or click here to contact me. You can also check out this pinterest board for links to more information. Follow the board - I'll add more links as I come across them.


This is the fourth time I've photographed little miss Makenna. I photographed her and her family at 6 months, 1 year, 2 years, and now 3 years. It's been so much fun to see her grow up! She is always sweet and fun and adorable and I'm already looking forward to her four-year session.

photo of a little girl smiling

black and white photo of a little girl smiling


Lambie is Makenna's little cuddle buddy and no photo session would be complete without a photo of him.

photo of a little girl clutching a stuffed animal

photo of a little girl and her lovey


Makenna's first session was one of my first in-home sessions and to this day it's still one of my favorites. They've kept up the tradition and we've done every session at their house, but each one has been different.

We moved the old church bench from their front porch to the back yard. It took a little bit to convince her to lay down on it, but she was happy to sit there at first.

black and white photo of a little girl on an old church pew

black and white photo of a little girl laying on an old church pew

When the session was over, I told Makenna I had to leave and she asked if I could please stay and play a little first. So I sat down and played Elefun with her for a little bit. Did I mention how stinking cute and sweet this girl is?

You can see more photos from this session on my facebook page. Click "like" on the page while you're there to see new photos in your newsfeed and be the first to learn about specials and new products. Make sure you hover over the "liked" button and click "show in newsfeed" or check your "pages feed" tab (on the left side of your screen) to see new posts.

If you're looking for a child or family photographer in the Wabash Valley area, I'd love to hear from you! You can see pricing and details here or click here to contact me.

This is week 24 for the This is Our Life project and the theme is "solitude."

This was a tough one...there's really not a lot of solitude going on around here. The only time anyone really gets any is at nap time. I get some editing or other work done, or some reading, or laundry, or on a rare occasion a nap. Jack and Jonah sleep. In the summer when they're home, Joey and Abbie usually get some reading time in before they play with Legos or Barbies. 


This is part 4 in my Momtography series. If you missed the first 3 posts, or need a little refresher, click here.

If you've got the basics down, now it's time to move on to the harder stuff...recitals, plays, sports, snow, vacations, and holidays, and fireworks.

These tips are just a few  basics to get you started. If you want to know more about any of them, a quick google search should give you way more information that you ever wanted to know. Also, it's just what's worked for me, there are other approaches and ideas out there.

Vacations are tricky for me, trying to balance capturing it all with my camera, and actually enjoying the trip and being in the moment. I've done vacations three ways: I've lugged my big old DSLR and Speedlight around with me everywhere (even while climbing all over everthing at St. Louis's City Museum, which was not easy!), I've left the big camera at home and just taken my point and shoot, and I've done a combination. I got the best photos with the DSLR of course, but the times I just took my point and shoot I got perfectly good photos, and didn't spend the trip lugging around a heavy camera and worrying about it getting lost or stolen, or having to carry around the camera bag every time we had to park the stroller. On our last trip, I took both. I used the DSLR when I knew there would be tricky lighting or I needed a long lens, and used the point and shoot for other stuff.

Here are a few tips for vacations.

1. If you don't already have a good understanding of how your camera works, use a simpler camera for the trip, or leave it on auto. Spending quality time with your family in a fun place is not the time to be fiddling with camera settings and being frustrated with your photos. Enjoy your family!

2. Take lots and lots and lots of photos, especially if you're somewhere you're not likely to go again, or at least not anytime soon. You can always weed them out later, but you never know what little detail you'll want to remember.

3. Take detail shots and close-ups of your kids, but don't forget to zoom out or step back once in a while. Variety is good.


4. Hand your camera off to your kids once in a while. It's fun to see what kind of shots they take, plus it's good for them to be creative and learn to look at things in new ways. If you're scared to let them use your camera, get them a little cheap one of their own. Make sure they take a photo or two of you.


5. Take a little tripod (gorillapods are awesome) or hand your camera off to a stranger to get a shot of your whole family. You don't want to get back home and realize there are no photos of the whole family from the trip. Trust me on this one.


6. If you're going to the beach, remember that the sand and water will reflect the light. In my experience, this makes photos super easy as there are not too many harsh shadows. Morning and evening will still give the best light, but mid-day photos are easier at the beach that anywhere else. Beaches are also a great place for silhouettes. They're actually really easy. All you have to do is expose for the sky. Set your camera to get a good exposure of the sunset (or sunrise) and then get your kids in front of you and shoot towards the sun. Easy peasy and lots of fun.


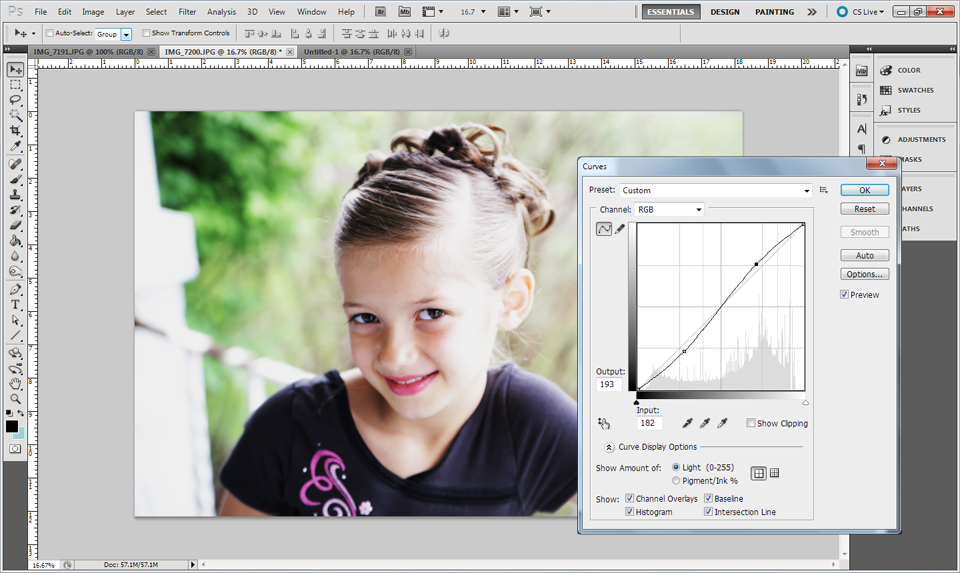
Taking photos in the snow can also be tricky. The thing to remember is that your camera's meter will most likely underexpose the photo if you leave it on auto. You'll need to use manual mode, or exposure compensation, or brighten it up in an editing program, to get get the right exposure. The snow tricks the camera into thinking the scene is brighter than it really is. I've also noticed that photos taken in the snow tend to look a little blue. I just warm them up a bit in Lightroom, but you can also easily fix that by adjusting the white balance in your camera. Read your camera manual to learn how to do that. It's super easy.


If you have kids, at least one is probably in a sport of some kind. If you're lucky, it's an outdoor sport. They are way easier to take photos of since you won't have the added issue of low light. My son plays football, and played baseball for one season, so that's really the only sports experience I have.

The two most important things you need to watch out for in photographing sports is shutter speed (as fast as possible) and focusing.

If you're using manual mode, set your shutter speed first, then adjust your ISO and aperture to compensate. Ideally, you'll want at least 1/500 sec. for your shutter speed, and faster than that is even better. If you're not using manual mode, at least use the sports mode if your camera has one.

A nice long lens (at least 200mm) is something you'll want to invest in if you plan to take a lot of sports photos.

Set your focus mode to AI Focus or AI Servo (if you're using Canon - I'm not sure what it's called on Nikon) to focus on a moving subject. You can press the shutter button halfway down and the camera will keep focusing on the subject until you take the photo.


Walk around as much as you can - you'll get a much better variety of photos if you're not stuck in the same spot through the whole game. Don't forget to take photos of the kids on the sidelines and the little details sometimes too.


Another situation that's a little tricky to take photos of is fireworks. If you're taking photos of just the fireworks, you'll want to set your ISO to 200 or 400, your aperture to around 16, and use a long (at least 2-3 seconds) shutter speed. You can check your images on your camera's LCD and adjust your exposure as needed from there. Experts advise to use a tripod, and you'll definitely get the best photos that way, but honestly who wants to sit at a fireworks display with kids and be messing with a tripod? Not me. I usually just hold it as still as I can and hope for the best. You can see in this photo that it's not the sharpest and there is some ghosting in the tree line, but it's good enough for what I wanted it for. If you're wanting to print it poster size and display it somewhere, use a tripod!

Another fun thing to try is going the complete opposite direction - instead of holding the camera at still as you can, wave it around and see what you get. It's kind of fun.


If you want to take photos of people with fireworks, you'll want to set your camera for the fireworks, then add flash. If you're using a point and shoot, try the nighttime portrait setting if your camera has one.

So that covers the 4th of July...now on to other holidays. For whatever reason, I'm bad about remembering to take photos of holidays. I'm more likely to get my camera out at random times instead of when I "should." I'm weird like that. There's always a photo of the kids in their new clothes on the church steps for Easter, an egg hunt if we have one, and lots of photos of Christmas at home, but all the others are hit and miss. There have been several Thanksgivings when I haven't even touched a camera.

So Easter doesn't really require any tips - the photos can be taken outside, so it's just a matter of remembering to take the photo, finding a good spot, and trying to get all the kids to look in my general direction, or least sitting in one spot.


Christmas is the one that can be tricky. Here are a few things I try to keep in mind as I'm shooting Christmas photos.

1. I use my DSLR for Christmas morning photos because the flash recycles a lot quicker and because it's just habit I guess. Also I rarely use the point and shoot in the house because our house is kind of dark and I hate using the flash on that thing. I like the control of being able to bounce the flash for softer light. I you don't understand that, go back and read part one of this series.

2. I get the camera out the night before and get all the settings right for the light in the room. It's still dark outside when my kids get up for Christmas morning, so I won't have any extra light coming in to change the settings. So I just get it ready, have the flash attached, and set it on my desk or the table or wherever so I can just grab it when the kids get up.

3. I take photos of the kids with their stockings, opening a couple of presents (especially whatever is their "big" present for the year, the one I know will get the best reaction) and then a few of them playing with the presents. I try to capture their real reactions and I don't ask them to pose except for maybe one of all the kids in front of the tree at some point and maybe a few with me and/or my husband.


5. I don't try to capture every little moment because I want to just experience it, you know? I don't want to miss out on just having fun with the kids because I want busy taking photos all day. So I take what I want then put the camera away so it doesn't get trampled under the mountain of wrapping paper and I'm not tempted to drive my family crazy with it.

6. To get the lights on the tree to look good, I know I'll need a wide aperture and for the kids to be fairly far from the tree. This will throw the lights out of focus and make them look bigger and brighter. I usually take some photos like this in the weeks leading up to Christmas, I don't necessarily think about this on Christmas morning. If I get one then, that's awesome, but I'm much more concerned with capturing their expressions when they open the presents they've been wanting but didn't think they'd get.


7. It's pretty hit or miss whether I remember to take many photos when we're with our extended family. We always to go my parents' house, somewhere with my husband's family, and to my Grandma's house (luckily, those are all on different days, not all on Christmas Day!). Sometimes I take the DSLR and take lots and lots of photos, sometimes I take it and it stays in the bag, and sometimes I just take the point and shoot and take just a few photos. Just depends on my mood really, and I should really get better about that.

The last thing I'm going to cover here is recitals. My daughter has been in three dance recitals but I've actually only taken really good photos at one. Her first one I only took photos of the dances themselves. That dance studio had stage moms and the other moms got to watch the show, so I wasn't backstage for that one, and really, backstage offers the most photo opportunities. I missed her second dance recital. Yup, I missed it. The date changed for the recital after I already had a wedding booked for the day, so I had to miss it. Her third recital was just a couple of weeks ago, and with the new dance school came a few changes, one of which was that all the moms are backstage. I was able to capture SO many cute little moments with Abbie and her friends backstage that I would have totally missed if I were out in the audience. I was able to go out and watch her dances with my husband, so it was the best of both worlds really.

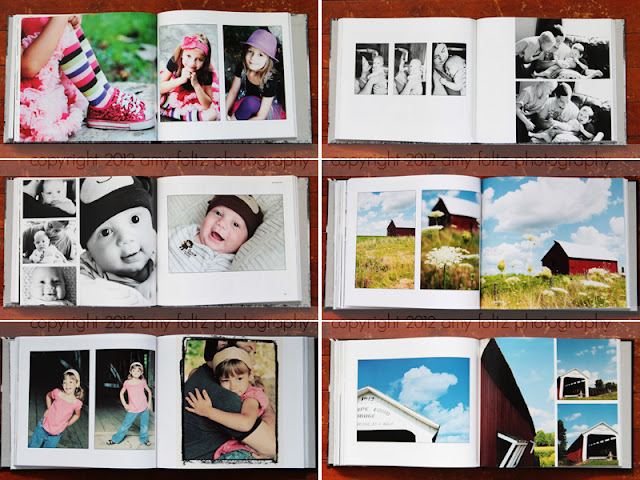
Maybe it's totally overkill, but I approached photographing that recital like it was a wedding - close-ups, posed shots, details, candids - I took them all. I mean, what else was I going to do while I was stuck backstage for 4 hours?

(the other girls' faces are blurred because I didn't think to get their moms' permission to post the photos)


Backstage stuff is easy as long as you know your camera setttings and can bounce a flash. It's the actual dances that can be tricky. Flash is generally not allowed and it wouldn't help anyway. Flashes usually have a range of about 10 feet or so, so even if you were allowed to use it, you wouldn't be close enough for it to help anyway. Luckily, the stages are usually well lit, so as long as you can bump up your ISO fairly high (at least 2000 or so) you should be ok. Open up your aperture as far as it will go and keep your shutter speed as high as possible. My settings were around ISO 6400, f/2.8, 1/500 sec. Use the longest lens you have.

Set your camera to continuous shooting  and fire away. Take lots and lots and lots of photos and weed out the bad ones later. It's worth sorting through 50 shots to get just the right moment in a dance that's been practiced for months.

One other tip: If you can, try to take as many photos as possible of the dances at the dress rehearsal. It will take some of the pressure off at the actual recital. I still take photos at the recital too, but not as many. It's nice to sit back and just be able to watch. Also, make sure you know your daughter's dances so you know which moves you most want to capture.


I hope that was helpful! If you have any questions about any of this, feel free to leave a comment here or on my 
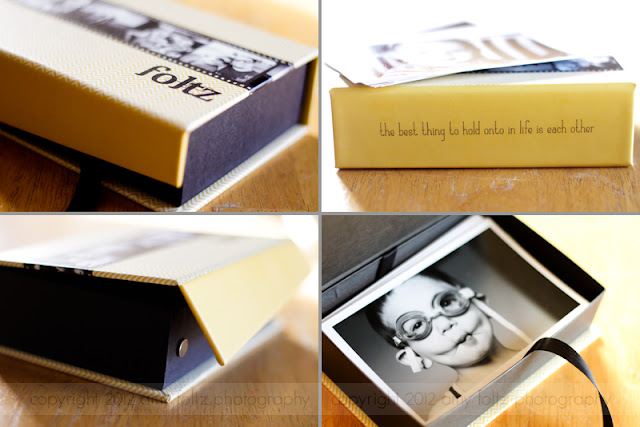
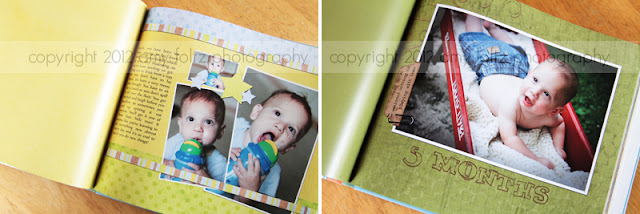
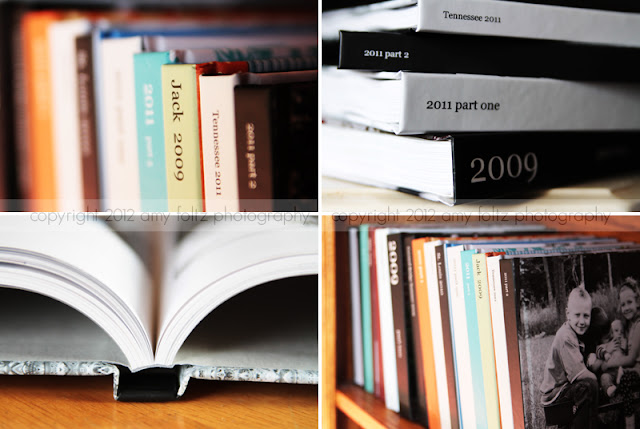
facebook page and I'd be happy to try to help! Watch for the last post in this series next week. I'll cover everything I do after the photo is taken - organization, backup, printing, and a few very basic editing tips too.


Newer Posts Older Posts Home

ABOUT ME

SUBSCRIBE & FOLLOW

Contact Form

Name

Email *

Message *

Menu

  • Pricing
  • Families
  • Babies
  • Children
  • Seniors
  • Weddings
  • Fine Art Prints

My Instagram

POPULAR POSTS

  • Piper - One Year Session
  • BIG giveaway contest {Terre Haute photographer}
  • Wyatt - South Vermillion Class of 2023 {Clinton, Indiana Photographer}
  • Katie {Clinton, Indiana senior photographer}
  • Wagner-Mergen Family {Greencastle, Indiana Photographer}
  • Terre Haute Family Photography {Speidel Family}
  • Guinn family {Terre Haute family photographer}
  • Little Sweetheart {Terre Haute baby photographer}
  • sneak peek! {Terre Haute child photographer}
  • Everett {Terre Haute Newborn Photographer}

Categories

  • at home sessions 94
  • babies 41
  • couples 67
  • engagement 49
  • extended families 9
  • families 202
  • kids 135
  • maternity 6
  • newborn 36
  • personal 151
  • seniors 78
  • studio sessions 2
  • Teens 38
  • toddler 30
  • travel 24
  • wedding 104
Powered by Blogger.

Copyright © Amy Foltz Photography. Designed by OddThemes